Words by Michael Rodio, Photography by Jonathan Selkowitz
Originally published by Men's Journal
Sure, you probably hit leg day like every other dude in the gym. But when it comes to dominating the slopes at the beginning of ski season, your everyday routine of squats and deadlifts will only go so far. No, if you want to get through rough conditions and fresh powder with enough muscle to ski all day, you need a specialized skiing workout.
To get a routine that’ll build muscle endurance and raw leg strength to conquer even the mightiest mountains, we talked to Bode Miller, a six-time world champion and Olympic gold medalist. This finely tuned workout regimen has helped the 39-year-old New Hampshire native battle back through any number of gnarly injuries—like the knee issue that benched him for the 2013 season—on his way to becoming the oldest Alpine skier in history to win an Olympic medal.
He’s not just a ski bum, either: Miller made his TV commentating debut for NBC in 2015, and he’s signed on as chief innovation officer at Aztech MountainOpens a New Window., the Aspen-based ski gear brand, after being impressed by one of their jackets during a surprise snowstorm in the Andes. (“I spend most of my life in winter jackets,” he admits.)
Here, Miller details his go-to skiing workout routine. Other than a slack line or physio ball and a stationary bike, it requires almost no equipment—but it’ll train your legs for serious high performance on the slopes.
How It Works
With this workout, Miller says, “I try to mimic the sport as best I can—not necessarily in form, but in function. In skiing, that means overall leg strength, but also the little muscles in your legs and ankles.” It focuses on three elements: strength/power, muscle endurance, and agility/coordination.
Miller starts with a warmup of isometric holds on a slack line. (Don’t worry: you can also use a physio ball!) “It sharpens your brain and activates stabilizing muscles,” he says. “Put your feet on the box and your hands on the slack line, or vice-versa. Either way, your body has to make hundreds or thousands of microadjustments to stay balanced.”
Next comes strength and endurance training in the form of 45-second high-intensity intervals. “You want to have lactic acid built up, and then recover a little, so you’re spiking your heart rate,” he says. “The human body can go for about 20–30 seconds on anaerobic respiration, so 45 seconds of work is a good target, even if your intensity will inevitably fall off slightly. It’s impactful on the hill—you ski about that long between stops on the hill.”
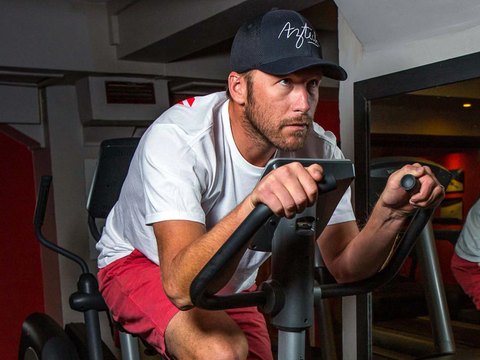
From there, you’ll move to a circuit of “grinders” on the stationary bike. “They’re one of the most important exercises for muscle endurance, blood volume, and lactic acid resistance,” Miller says. “Something about that slow, ‘grinding’ cadence seems to translate better to skiing.”
In the cooldown, you’ll do more isometric balance training, which forces your supporting muscles to work when tired and you’re tempted to cheat on your form. “Once fatigue sets in, you risk getting injured,” Miller says. “Forcing those smaller muscles to work together after a workout is a great way to reduce that injury risk.”
Directions
For each of the three strength-training exercises, you’ll do 45 seconds of work, followed by a short rest, then another 45 seconds of work, and so on, for a total of at least 6 rounds per exercise (Miller often does 8–10 rounds of 60 seconds of work). He uses a “sliding recovery scale,” so each successive rest period is 5 seconds longer than the previous one, starting with 20 seconds. For example:
Work 45 seconds / Rest 20 seconds
Work 45 seconds / Rest 25 seconds
Work 45 seconds / Rest 30 seconds
Etc.
Follow that with the metabolic conditioning as directed, then the cooldown.
WARMUP
Set up a slack line about 12″ off the floor. If you don’t have a slack line, use another tool for instability, like a physio ball or (if that’s too difficult) a BOSU with the round side up.
Get into a plank position, with your forearms on the slack line/ball/BOSU and your feet on the floor. For added difficulty, set your feet on a box at the same height as the slack line; this shifts more of your body weight to the unstable side. You can also switch your position, so your legs are on the slack line and hands are on the box.
Do each exercise in sequence. Hold each position for 20 seconds. For single-leg or single-arm exercises, switch after 10 seconds. Do this circuit twice.
1. Plank: Forearms on slack line, feet on floor.
2. Lateral circles: Lift your left leg and move it out to your side. Move it in small circles for 10 seconds. As you put it back down, lift your right arm and do 10 seconds of circles. Right leg is next, then left arm.
3. Single-leg side plank: With both forearms square on the slack line, rotate to your left side as you would in a side plank (hold on with your right hand for balance). Shift your weight to the inside of your right foot, bring your left leg forward, and hold it in front of you for 10 seconds. Bring your left leg back to center, shift your body so you’re on your right elbow, and do the same with your right leg.
STRENGTH TRAINING
1. Single-Leg Uphill Hops
How to do it: Hop on one leg up a flight of steps, or an equivalent distance up a hill, as quickly as you can. Walk back down. That’s one round. Switch legs each round.
Miller’s pro tip: “This is one of the most impactful ways to improve balance and muscle endurance.”
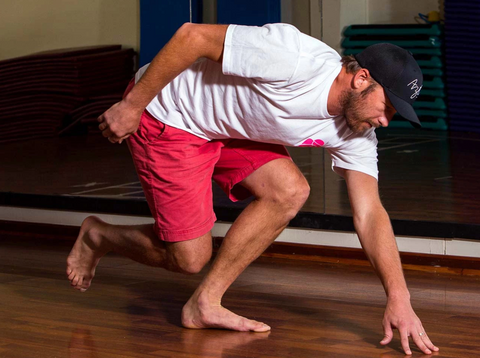
2. 360-Degree Standing Reach [shown below]
How to do it: Grab some cones, or a roll of tape that’s easy to remove (blue painter’s tape or masking tape are both good). Stand with your feet together, and then mark the eight compass points (north, northeast, east, etc.) around you. Standing on one leg, reach for each marker around the circle, trying the whole time to maintain your balance on that one leg.
Miller’s pro tip: “This strengthens each leg individually by simulating that low squat position you’re in while skiing, via isometric holds and controlled motions. When you really have to stretch and reach and balance, you’re combining big muscle groups—legs, glutes, and back—with little microadjustments in your supporting muscles.”
3. Single-Leg Box Jumps
How to do it: Start with a 12” box. Jump off one leg onto the box, making sure to land softly on that one leg. Make sure to fully extend your hips after you’ve landed. Step down with your other leg. Switch legs for each jump.
Miller’s pro tip: “I step down slowly, which helps increase the eccentric load on the legs. If you can, you hold dumbbells in your hands, so you can load your body even more when jump up, and slow down the eccentric phase.”
CONDITIONING
“Grinder” Interval Workout
How to do it: Set a stationary bike to the maximum level of resistance you’re comfortable with. Pedal at about 60 rpms for 3 minutes. Rest 3 minutes. Do 3–4 rounds of work-rest.
COOLDOWN
As with the warmup, set your elbows on the slack line or ball and your feet on the floor. Hold each position for 20 seconds.
1. Plank (as in warmup)
2. Side plank (one forearm on slack line, other hand on slack line to support).
3. Single-leg side plank (as in warmup.)
4. Single-arm side plank (one elbow on slack line, other arm extended in line with your torso.)